Creating Classes
Adding New Classes
A user must be either a Teacher Admin or School Admin to create classes within the portal.
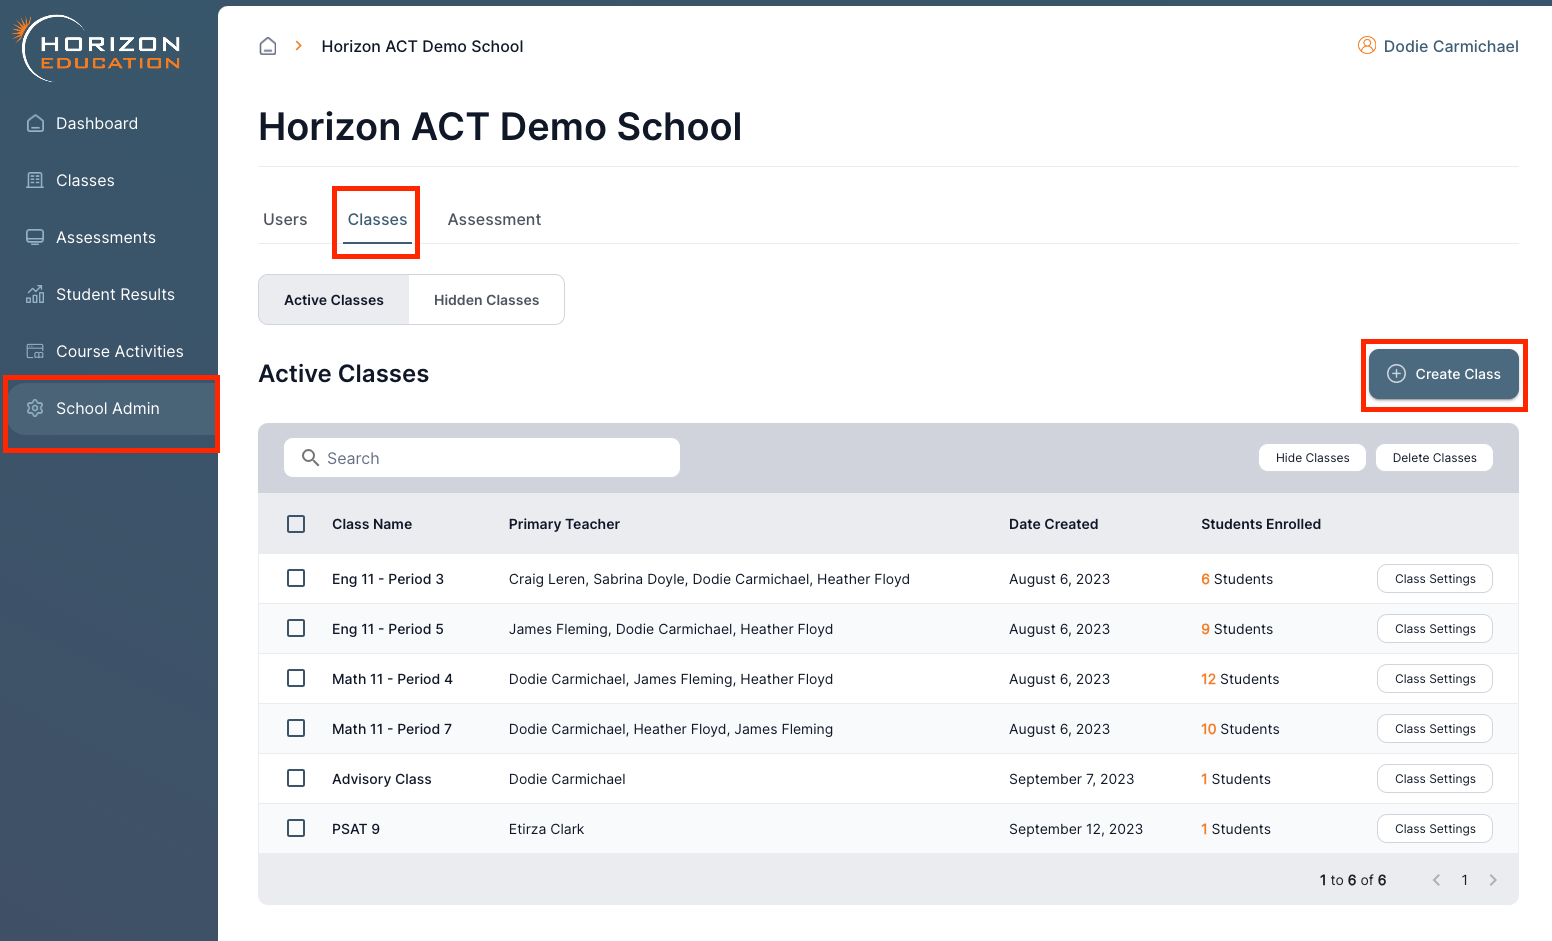
Select the “School Admin” tab on the left-hand menu.
Click “Classes” underneath your school’s name.
Click the “+Create Class” button on the right side of the screen.
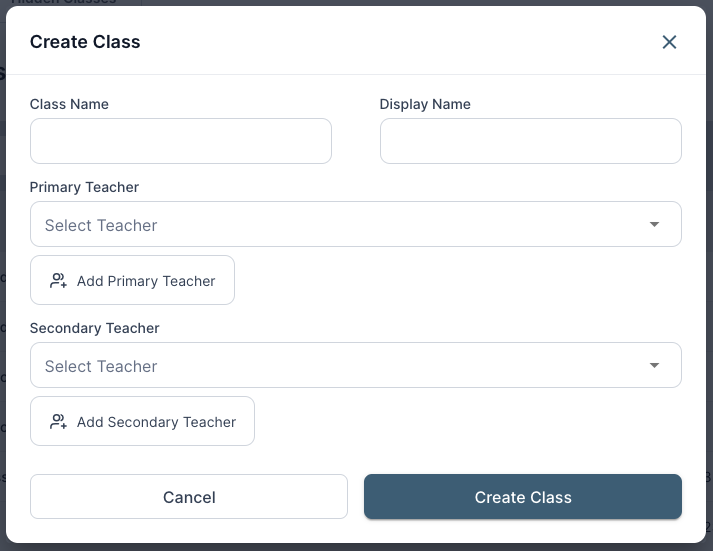
Input the following information:
Class name and Display Name
Add a Primary Teacher - this teacher will be able to Edit Class Settings, Add/edit/transfer/delete students from the class (unless the class was generated by Clever/ClassLink), Add/edit/delete assessments/course activity assignments, View individual student results for students in classes they are primary teacher, and View group summary level reporting data for all other students at the school (can’t view individual student results).
Add a Secondary Teacher (Optional) - this teacher will be able to View Class Settings, View Student Enrollment for the class, View assigned assessments and course activities, View individual student results for students in classes they are secondary teacher, and View group summary level reporting data for all other students at.
If you need to edit the Settings of a class that has been created, under “Classes”, you can view all Active Classes. Select the “Class Settings” button next to the class you wish to edit. Here, you can manage the Students in the class, create/manage the Assessments for this class, or edit the Class Settings.


Last updated